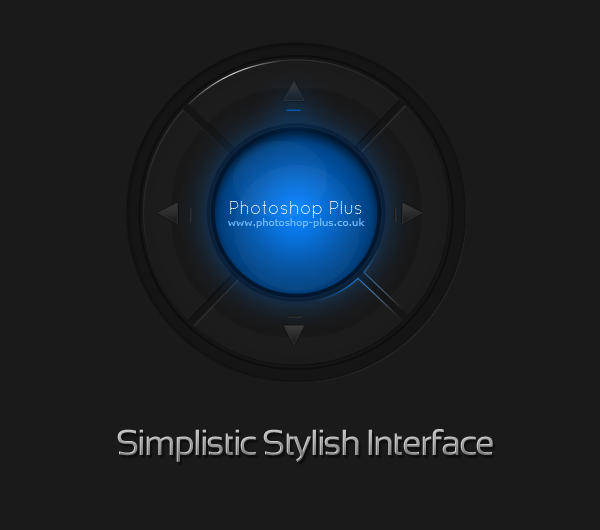
What We’ll Be Creating
Getting Started
Create a new document (Ctrl + N) using the dimensions 600 x 530 pixels, then fill (G) your background layer with the color #1a1a1a. Were now going to setup some guides so that interface is symmetrical.
Go to “View > New Guide” then enter in pixels half of the dimensions of the canvas, so for example our canvas width is 600px so the guide will be 300px. Repeat the process for the horizontal guide. The the purpose of the screenshots I’ve hidden my guides for this tutorial.

Creating The Main Outer Circle
Select the “Ellipse Tool” (U) from the menu then change the path type to shape layers.

Now drag out an ellipse onto your canvas, once your happy with the ellipse use the “Move Tool” (V) and place it in the middle of your canvas using your guides to get the circle centered with your canvas area.

Label your new shape layer “Main Outer” then add the following layer styles using the settings below.


You should have something like this.

Creating The Main Inner Circle
Duplicate the “Main Outer” layer then rename the duplicated layer “Main Inner”. Press “Ctrl + T” on the keyboard to access the “Free Transform” tool, now hold down the “Shift” key and the “Alt” key whilst dragging one of the corner anchor points. Make the “Main Inner” circle about 15-25px smaller than the “Main Outer” circle.
Quick Tip:
Holding down the Shift and Alt key down on the keyboard will transform the object from the center of the object opposed of from the corner your transforming from.
Right-Click your “Main Inner” layer and go to “Clear Layer Styles”, now add the following new layers styles to the layer.


You should have something like this.

Creating The Buttons Circle
Duplicate the “Main Inner” layer then rename the duplicated layer “Buttons”. Right-Click the “Buttons” layer then go to “Clear Layer Styles”, now press “Ctrl + T” to free transform the shape. Hold down the “Shift” and “Alt” keys on the keyboard then re size the circle with one of corner anchor points, re size the shape by only about 3 – 4 pixels.
Add the following layer styles to your “Buttons” layer using the settings below.


You should have something like this. The “Main Inner” layer should be visible underneath the “Buttons” layer.

Click the vector mask thumbnail in the layers window so that the shape is selected, then select the “Rectangle Tool” (U). Change the path type to “Subtract From Shape Area”.

Drag out two rectangles across the “Buttons” layer from one end to the other. You should have one vertical rectangle and one horizontal rectangle, you can use your guides as a guide for the rectangles.

Select the two rectangle paths by click the rectangles one at a time whilst holding down the “Shift” and “Ctrl” keys on the keyboard. Once both rectangles are selected press “Ctrl + T” then rotate the rectangles so they look like an X. You should have something like this.

Creating The Buttons
Create a new blank layer labeled “Buttons Shine”, make sure the “Buttons Shine” layer is highlighted then click the thumbnail inside the “Buttons” layer whilst holding down the “Ctrl” key on the keyboard, doing this should load a selection around the shape. Select the “Fill Tool” (G) then fill the selection with the color white.

Select the “Elliptical Marquee” tool (M) then make a selection inside the “Buttons Shine” layer. Once you’ve made the selection hit the delete key, you should be left with something like this.

Set the “Buttons Shine” layers opacity to 2% then select the “Polygonal Lasso” tool (L). With the “Polygonal Lasso” (L) tool create a small triangle shape, put the shape inside the top button in the middle towards the top. Once your happy with the position duplicate the triangle and move it to the other 3 buttons.

Now add the following layer styles to your little triangle layers.


Were now going to create the little blue lights underneath the arrows. Underneath each arrow create a small thin line using the “Rectangle” tool (U).

Once you’ve created the lines underneath each arrow add the following layer styles to your left, right and bottom lines.


Select the top line layer and add the following layer styles.

You should have something like this.

Creating The Outer Orb Circle
Select the “Ellipse” tool (U) then make a circle in the center of your interface.

Now add the following layer styles to your new circle, after you’ve added the layer styles label your new layer “Orb Outer”.


You should have something like this.

Creating The Center Orb
Create a new layer and label it “Orb”, select the “Ellipse” tool (U) and make another circle inside the “Outer Orb” circle layer. This new circle should be about 4 pixels smaller than the last one as shown in the image below.

Now add the following layer styles to your “Orb” layer.


Were now going to create the little orb reflections, grab the “Elliptical Marquee” tool (M) or the “Ellipse” tool (U) then drag out a small circle in the top left side of the orb.

Fill (G) the circle with the color white (#ffffff) then set the layers opacity to 3%. Select your desired ellipse tool once more then make another circle towards the bottom middle of the orb.

Fill (G) the circle with the color white (#ffffff) then set the layers opacity to 3%. Finally select the “Type” tool (T) and add some text inside of the orb.

Adding The Interface Light Effects
Select the “Pen” tool (P) then with a 1px brush add some lines, when creating the lines path follow the contours of the shape your adding the line to.

The line at the top simply add a layer mask to, then drag a “Reflected Gradient” from the middle of the line dragging outwards.

The lines at the bottom add a layer mask then drag a “Reflected Gradient” diagonally across blending in the the lines nearest the orb. Once you’ve dragged the gradient over the line, right click on the mask in the layers window and go to “Apply Layer Mask”.
Re-add the layer mask to the layer then drag a “Linear Gradient” from the bottom towards the orb. The look were trying to achieve is to have the lines where they end blend into the interface.

Finally to the lines at the bottom add a gradient overlay using the settings below.

Conclusion
That’s it, you’ve completed the tutorial. Hopefully you should have something like mine, feel free to share your results with the rest of us. Look out for a more advanced interface tutorial coming soon. Thanks for reading.
Tom loves to write on technology, e-commerce & internet marketing.
Tom has been a full-time internet marketer for two decades now, earning millions of dollars while living life on his own terms. Along the way, he’s also coached thousands of other people to success.